
 Here is my pattern for a newborn size hat with earflaps. By newborn size, I mean the hat is designed to fit a 13" to 15" head (33-38cm). You may make this hat without earflaps if you wish; I designed the pattern to meet the requirements of afghans for Afghans guidelines for their newborn hat and sock project. It has a fold-up cuff that can be unfolded as the baby grows. The pattern for the top-down version of the hat can be found here. To see a photo of Sarah's beautiful fairisle version visit here.
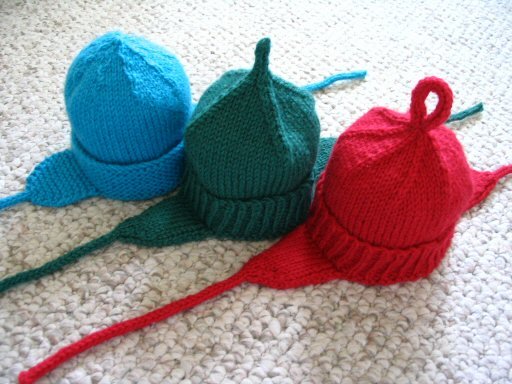
In the photo above left, you see from left to right a blue hat, a green hat and a red hat. Where there are variations in the pattern, I will use colored text to show the differences in the directions for each hat as shown. You may of course mix and match the design variations to suit yourself. The blue hat has a garter stitch cuff, a serpentine decrease design and a smooth top. The green hat has a ribbed cuff, a square decrease pattern and a short tail on the top. The red hat has a ribbed cuff, a spiral decrease pattern and a loop on top that may be used for hanging.
The hats take a little less than 50 grams of worsted weight yarn to make up. I used leftover wool yarn for my samples, Nature Spun worsted and Patons Classic Wool. The yarn ball bands recommend a size 7US/4.5mm needle, but I used a size 6US/4mm because I wanted the hats to be a little bit more densely knit for warmth. There isn't very much difference between the two needle sizes, so use the size that suits you. I recommend using a set of 4 or 5 double pointed needles (DPNs) and a 11.5"/29cm circular needle in your chosen size. At the very minimum you will need a set of DPNs to make the hat as directed.
Abbreviations and techniques:
Rnd=round
K2tog=knit 2 stitches together.
ssk=slip the next 2 stitches as if to knit, put left needle in front of stitches and knit.
How to make I-Cord:
Using 2 DPNs, CO 4 stitches (or use the remaining 3 or 4 stitches after decreasing in this pattern). Knit all stitches. Next Row: Instead of turning the work around to work back on the wrong side, slide all stitches to the other end of the needle, switch the needle back to your left hand, bring the yarn around the back of the work, and start knitting the stitches again. Repeat this row to form I-cord. After a few rows, the work will begin to form a tube.
Knitty Magazine has great articles on Increasing and Decreasing, Picking up Stitches and Weaving in Ends.
Begin by knitting the cuff.
Cuff 1: Ribbed cuff used on red and green hats.
Cast on 64 stitches using circular needle.
Join into a round without twisting stitches and begin working knit 1 purl 1 ribbing.
Work ribbing until it measures 1.5"/4cm
Cuff 2: Garter stitch cuff used on blue hat.
Cast on 64 stitches using circular or DPN needle.
Work the piece flat, knitting every row until the cuff measures 1.5"/4cm
Join into a round without twisting the stitches and continue the hat working in the round.

Next, work the body of the hat.
Work stockinette stitch (knit every round) until the hat measures 5"/13cm long including the cuff.
Now work the decreases.
All 3 hats are decreased 8 stitches every other round 7 times, the difference is where the decreases are placed and whether they lean to the left or the right. Change from circular needles to DPNs when necessary.
Decrease pattern 1: Spiral, used on red hat.
Rnd 1: *Knit 6, k2tog* repeat from * to * across round; 56 stitches.
Rnd 2: Knit all stitches.
Rnd 3: *Knit 5, k2tog* repeat; 48 stitches.
Rnd 4: Knit.
Rnd 5: *Knit 4, k2tog* repeat; 40 stitches.
Rnd 6: Knit.
Rnd 7: *Knit 3, k2tog* repeat; 32 stitches.
Rnd 8: Knit.
Rnd 9: *Knit 2, k2tog* repeat; 24 stitches.
Rnd 10: Knit.
Rnd 11: *Knit 1, k2tog* repeat; 16 stitches.
Rnd 12: Knit.
Rnd 13: *k2tog* repeat; 8 stitches.
Decrease pattern 2: Square, used on green hat.
Rnd 1: Knit 6, *k2tog, ssk, knit 12* 3 times, k2tog, ssk, knit 6; 56 stitches.
Rnd 2: Knit.
Rnd 3: Knit 5, *k2tog, ssk, knit 10* 3 times, k2tog, ssk, knit 5; 48 stitches.
Rnd 4: Knit.
Rnd 5: Knit 4, *k2tog, ssk, knit 8* 3 times, k2tog, ssk, knit 4; 40 stitches.
Rnd 6: Knit.
Rnd 7: Knit 3, *k2tog, ssk, knit 6* 3 times, k2tog, ssk, knit 3; 32 stitches.
Rnd 8: Knit.
Rnd 9: Knit 2, *k2tog, ssk, knit 4* 3 times, k2tog, ssk, knit 2; 24 stitches.
Rnd 10: Knit.
Rnd 11: Knit 1, *k2tog, ssk, knit 2* 3 times, k2tog, ssk, knit 1; 16 stitches.
Rnd 12: Knit.
Rnd 13: *k2tog, ssk* across rnd; 8 stitches.
Decrease pattern 3: used on blue hat.
Rnd 1: Knit 3, *k2tog, knit 6* 7 times, k2tog, knit 3; 56 stitches.
Rnd 2: Knit.
Rnd 3: Knit 3, *ssk, knit 5* 7 times, ssk, knit 2; 48 stitches.
Rnd 4: Knit.
Rnd 5: Knit 2, *k2tog, knit 4* 7 times, k2tog, knit 2; 40 stitches.
Rnd 6: Knit.
Rnd 7: Knit 2, *ssk, knit 3* 7 times, ssk, knit 1; 32 stitches.
Rnd 8: Knit.
Rnd 9: Knit 1, *k2tog, knit 2* 7 times, k2tog, knit 1; 24 stitches.
Rnd 10: Knit.
Rnd 11: Knit 1, *ssk, knit 1* 7 times, ssk; 16 stitches.
Rnd 12: Knit.
Rnd 13: *K2tog* across rnd; 8 stitches.
Finishing the top.
Top treatment 1: Loop on red hat.
Rnd 14: *k2tog* across rnd; 4 stitches.
Make I-Cord on remaining 4 stitches until it measures 4"/10cm long.
Cut yarn about 4"/10cm long, draw yarn through all stitches to fasten off. Sew the end of the cord to the base of the hat to make a loop.
Top treatment 2: Short tail on green hat.
Rnd 14: *k2tog* across rnd; 4 stitches.
Make I-Cord on remaining stitches until it measures 1"/2.5cm long.
Cut yarn about 3"/8cm long, draw yarn through all stitches to fasten off.
Top treatment 3: Smooth top on blue hat.
Cut yarn at about 3"/8cm long. Draw yarn through the remaining 8 stitches, pull tightly and fasten off.
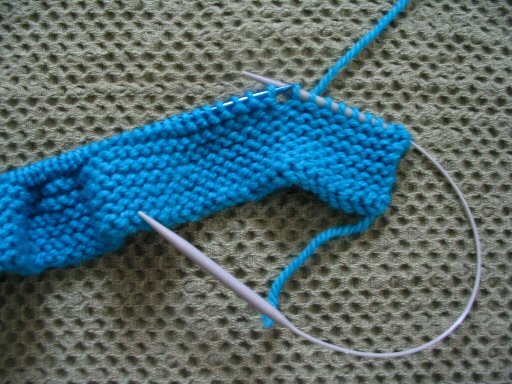
At Last, The Earflaps
In this step you'll be picking up 12 stitches along the edge of the cuff and then knitting them to form the earflap and tie cord. These earflaps are spaced evenly apart on the two sides of the hat. You may wish to use the decrease lines to help position them neatly.
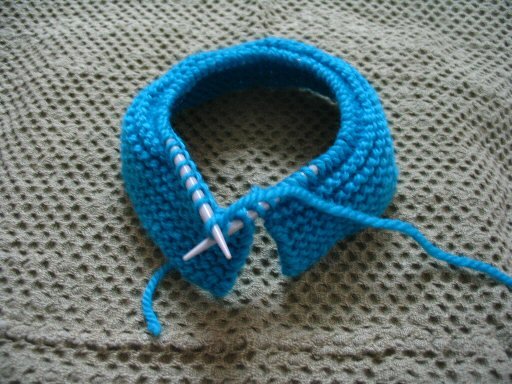
Place the hat in front of you upside-down with the cuff folded down so that you can just see the edge of the interior of the hat, as shown in the photos.
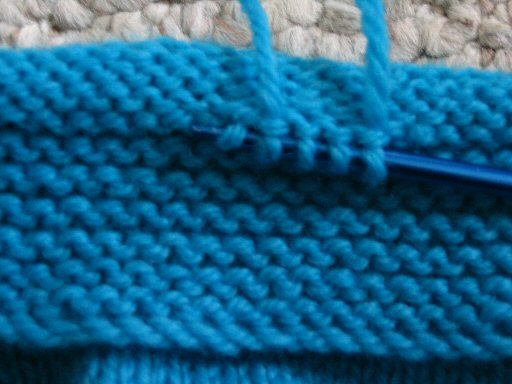
Edit: You will be picking up stitches along the folded edge of the cuff, where you changed from rib stitches to plain stockinette.
 Earflap 1: Used on red and green hats.
Pick up 12 stitches along the edge of the cuff, as shown.
Row 1: Purl 1, knit 1, purl 8, knit 1, purl 1.
Row 2: Knit 1, purl 1, knit 8, purl 1, knit 1.
Repeat rows 1 and 2 until the flap is 11 rows long.
Row 12: Knit 1, purl 1, k2tog, knit 4, ssk, purl 1, knit 1; 10 stitches.
Row 13: Purl 1, knit 1, purl 6, knit 1, purl 1.
Row 14: Knit 1, purl 1, k2tog, knit 2, ssk, purl 1, knit 1. 8 stitches.
Row 15: Purl 1, knit 1, purl 4, knit 1, purl 1.
Row 16: Knit 1, purl 1, k2tog, ssk, purl 1, knit 1; 6 stitches.
Row 17: Purl 1, knit 1, purl 2, knit 1, purl 1.
Row 18: *K2tog* 3 times; 3 stitches.
Continue working the remaining 3 stitches as I-Cord until the cord measures 6"/15cm.
Cut yarn about 3"/8cm long. Draw yarn through all stitches and fasten off.
Repeat for second earflap. Weave in all ends.
 Earflap 2: Used on blue hat.
Pick up 12 stitches along the edge of the cuff, as shown.
Row 1: Knit.
Row 2: Knit.
Repeat rows 1 and 2 until the flap is 11 rows long.
Row 12: Knit 1, k2tog, knit 6, ssk, knit 1; 10 stitches.
Row 13: Knit.
Row 14: Knit 1, k2tog, knit 4, ssk, knit 1. 8 stitches.
Row 15: Knit.
Row 16: Knit 1, k2tog, knit 2, ssk, knit 1; 6 stitches.
Row 17: Knit.
Row 18: *K2tog* 3 times; 3 stitches.
Continue working the remaining 3 stitches as I-Cord until the cord measures 6"/15cm.
Cut yarn about 3"/8cm long. Draw yarn through all stitches and fasten off.
Repeat for second earflap. Weave in all ends.


12 comments:
absolutely perfect! thank you so much for sharing!
Oh My!!!!! A friend pointed me in the direction of your pattern and it is just what I am looking for!!!! Thank you so much for sharing your lovely designs!
Love your hat! I just linked to it from my a4A KAL-CAL at http://afghansforafghanskal.blogspot.com/
Thanks!
Thank you so much for making this adorable hat pattern available! Your directions are clear, and the results so sweet!
Oooh! Thanks so much! I was just thinking I would like to do an Afghans For Afghans hat! This is perfect!
Thank you so much for sharing this pattern. I just finished my first one and already planning on making a second one.
Thank you for the info. I learned a lot. It will be grateful if you can put more cool patterns.
Thanks for posting this pattern! <3
Hi. I was wondering if I could make this for a 8 month old baby? Anyone know how many stitches I would have to cast on for that? Maizee123@yahoo.com. Thanks
Can this hat be enlarged to fit a 18 month old child and does anyone know how many stitches I would have to add to do this?
Thanks
Maizee123@yahoo.com
Is anyone here. I woul love to make this for. 1 year old can you tell me how many stitches to add??
Thank you so much for sharing. Will make these to donate.
Post a Comment