Monday, April 03, 2006

More Hats for Kids

A hat for JamesI've made some more hats over the weekend. These are for some neighbor children whose family is relocating to a colder climate than we have here in California. These soft woolen caps will surely help to keep them warm.

For James (photo left) a hat in primary colors of white, blue, black, red and yellow. Very colorful and difficult to lose in the snow, I hope.

A hat for Bailey For Bailey (photo right) a hat in the same white, blue, red and yellow of the first cap, but with pink instead of black in the mix.

It reminds me of an Easter egg in its color and patterns.

I hope she likes the softer effect of this colorway and finds the hat as easy to find in the snow as her brother's cap.

Chart for James' hatChart for Bailey's hatHere are the charts for the colorwork in the hats (the boy's hat on the left and the girl's hat on the right) in case you want to make your own version.

Knit in worsted weight wool, I proceeded the same as for the Child's Patterned Hat, substituting these charts for the one posted in that pattern.

I plan to make some mittens to match these hats. Their hands need to be kept warm too.

Saturday, April 01, 2006

Flashing The Stash

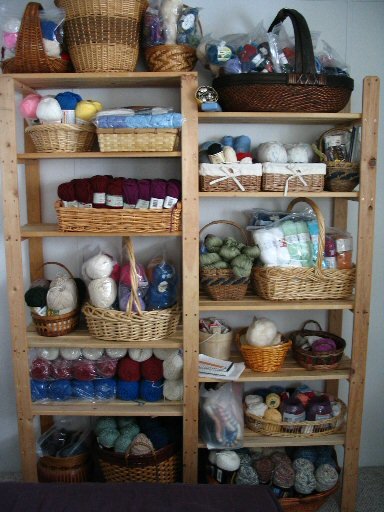
Yarn Stash on shelvesI managed to get my stash unpacked and put away neatly on this set of shelves. I have a nagging feeling that I'm missing some yarn, however. I know I should have some lopi and some other baby yarns that I haven't found yet. No matter, there's still room on the shelves for a few more bags of yarn.

You can see more than just a yarn collection in this photo, there's a basket collection too. I think baskets and yarn are meant to go together, don't you? Just like peanut butter and jelly. I love the textures of yarn, of baskets, of all textiles really. But we are not going to get into the topic of other textile stashes today.

Upper half of shelves with labelsI've taken close-ups and added captions showing what types of yarn are in each basket. Click on each photo to see a larger view. I've used zipper bags to protect the protein fibers (wool and silk) from any insects that may wander in, and to keep larger numbers of balls or skeins together. I prefer the 2-gallon size storage bags from the grocery store, which I have only been able to find in the store brand. My mother would love to use them, but finds the zipper too difficult to work; perhaps in the future I will be able to find them with the separate zipper device, then they would be easier to use.

Lower half of shelves with labelsThis shelf unit measures 58" wide, 15" deep and 74" tall. That's about 1.47m, .38m, and 1.88m respectively. With the baskets sitting on the top shelves, it reaches right up to the ceiling.

Looking at this pile-o-yarn, I realize that it is mostly intended for knitting things for other people. I was thinking about knitting a cardigan for myself, but don't have the yarn for it. With all this yarn, how is it that I don't have enough for a cardigan??

Monday, March 27, 2006

Are You Knitting With Toothpicks?

Tiny GlovesYou never know what people will say to you when you are knitting in public. The reactions people have to your activity can be most entertaining. I brought my knitting along to a birthday party in a public place the other day and was asked with some puzzlement if I was knitting with toothpicks?! I was knitting a sock on size 2 needles and had to agree with a grin, "Those look a lot like toothpicks, don't they?"

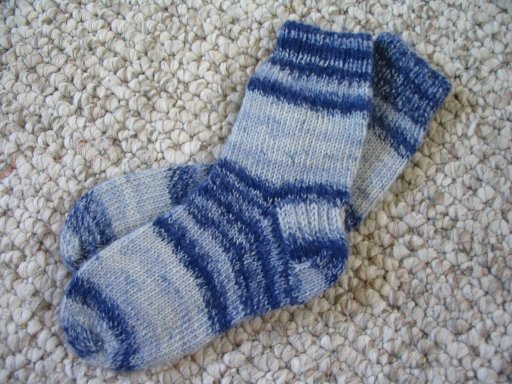
simple sockWhat I was doing was 'warming up my fingers' by knitting a pair of socks before attempting these tiny gloves. I don't knit with sock yarn every day, so it helps me to practice getting an even tension on a simple tube before getting fiddly with the fingers of a glove.

And what's with the tiny glove? I'm trying to work out the pattern for the Guatemalan toddler gloves of course. I will post the pattern for these when I have figured out all the details like sizing; this pair will fit a 1-year-old, which isn't terribly practical.

Saturday, March 25, 2006

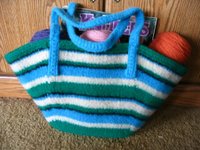
Felted Tote Bag

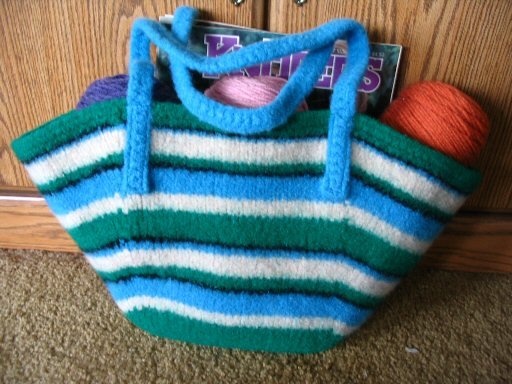
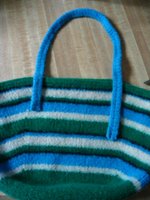
Here is a roomy handbag to knit using 2 strands of worsted weight wool. Make sure your yarn is not superwash wool or a natural white color or it will not felt.

I used Cascade 220 and a 30"/76cm size 11US/8mm circular needle for this bag; 2 skeins green, 1 skein blue, 1 skein sand and a small bit of leftover black. Also, 4 stitch markers, one to mark end-of-row and 3 to mark the position of increases. I used a red marker and 3 blue markers, and will refer to them by these colors in these directions. Gauge is not very important for this bag, and the exact size will vary with the yarn and needle size used. (If you choose to make the alternate handle, you will need a size K/6.5mm or L/8mm crochet hook)

Begin with the bottom of the bag.
With two strands of main color (green) cast on 20 stitches. Working back and forth to make a flat piece of knitting, work stockinette stitch for 60 rows. (Knit one row, purl the next row)
With knit side facing you, place blue marker on right hand needle and pick up 27 stitches along the long side of the knitted rectangle; place another blue marker and pick up 20 stitches along the cast-on edge; place another blue marker and pick up 27 stitches along the other long edge of the piece, place red marker.

Click for enlarged chart for stripe patternWork the sides of the bag.
Begin knitting in the round. Following the chart at left for color stripe placement (or design of your choice), knit 55 rounds of stockinette stitch (knit every round) continuing to use two strands of yarn; at the same time increasing 4 stitches every 4 rounds placed as follows:
Increase Round: Slip red marker, increase in first stitch by knitting into the front and back of the stitch, knit to 1 stitch before first blue marker, increase in this stitch, slip blue marker, knit to second blue marker, slip marker, increase in next stitch, knit to 1 stitch before third blue marker, increase in this stitch, slip marker, knit to red marker.

Round 56: Change to main color and knit all stitches.
Round 57: Purl all stitches.
Round 58: Knit.
Round 59: Purl.
Round 60: Knit.
Bind off all stitches. Weave in ends.
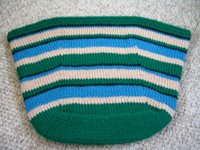
bag before feltingThis is what you should have. Laying flat like this, it measures about 24"/61cm wide and 17"/43cm long.

Make the handles.
Using 2 strands of yarn, cast on 5 stitches and work back and forth in garter stitch (knit every row) until the strap measures about 6'/2m long. Bind off.

Or, if you're in a hurry like I was, you can crochet an alternate handle:
Using a double strand of yarn and a size K/8mm crochet hook, make a chain about 6 feet (approx 2 meters) long.
Row 1: Starting in second chain from hook, single crochet in each loop of chain. Chain one, turn.
Row 2: Single crochet in each single crochet. Cut yarn and pull thru loop to fasten off.

The handle strap will be cut to length after felting.

Time to felt it.
Now throw the bag and the handle strap in the washing machine with a bit of detergent and a pair of jeans or other durable low-lint laundry items. Use the settings for high agitation, low water level, hot water wash and cold rinse. You will probably need to do this at least 2 times, depending on the machine.
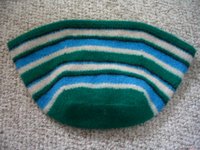
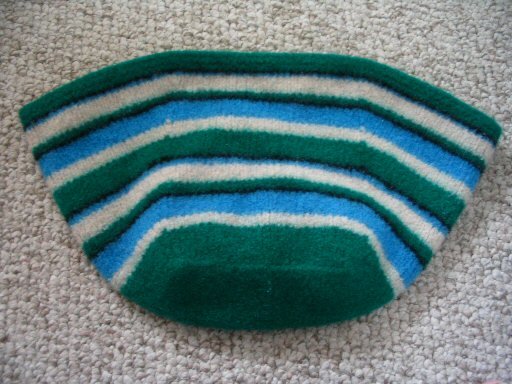
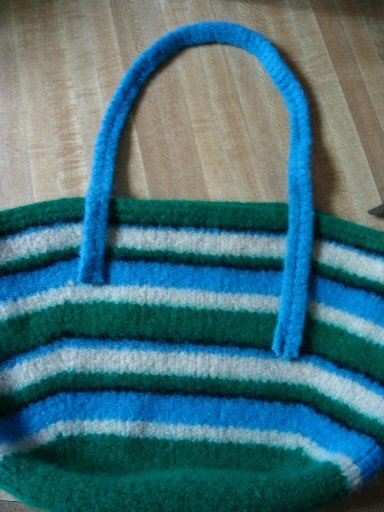
bag after feltingThis is what it looks like after felting. My bag now measures about 21"/53cm wide by 12"/30cm tall after 2 wash cycles. Most of the stitch definition is gone and it has a uniformly fuzzy look to it. The fabric has a nice thickness and stiffness to it, enough to hold its shape while in use without stretching.

It has shrunk a little bit more in height than in width. Different yarns shrink differently when felted, so the proportions of your bag may not be exactly the same as mine.

The handle strap has shrunk to about 4'/3.25m long, but after tugging on it and stretching it out as much as it will go it ended up at about 5'/2.5m long.
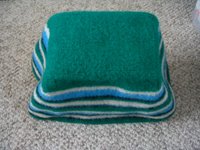
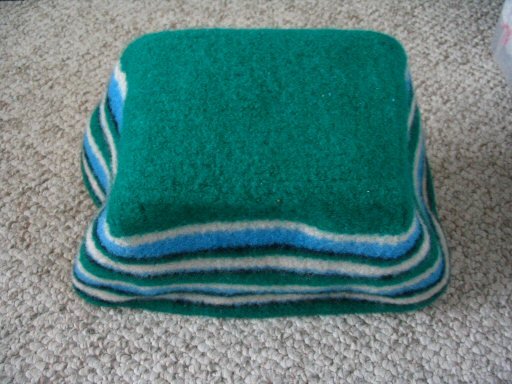
felted bag dryingSmooth the bag into a boxy shape and allow it to air dry over a box or basket of the right size to fit the bag bottom if possible to prevent creases.

Hang the handle strap over your shower curtain rod to dry.

Drying takes several hours. I left mine to dry overnight.
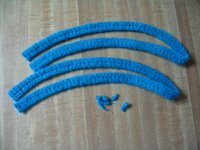


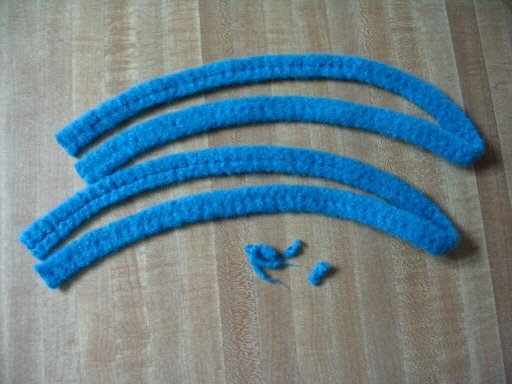
Bag handles after cutting and trimmingWhen the pieces are dry it's time to assemble the bag.
Take the long bag handle strap and trim the ends to make them square and even. Fold the strap in half to find the center and cut it in half. Now you should have 2 handle straps of the same size.

If you have made crocheted handles, you will notice that they curve. That's because the chain shrinks more than the single crochet does. This is ok, and it actually helps to pre-shape your handles for you.


Choosing a position for the handlesNow decide where you want your handles to be attached. You will want to use the vertical line of increases as your guide for placing the ends of the handles, but how far they overlap the top edge of the bag is up to you. The shorter the overlap, the longer the finished handle. The longer the overlap, the shorter the handle and the more support for carrying heavy objects. In the photo at left I show 2 possible ways to attach the handles.

Once you decide exact placement of the handles, you will want to sew them in place. You may use matching yarn and a tapestry needle to do the job or you may prefer to use a sewing machine for strength and durability. I used a sewing machine and matching sewing thread to sew the handles on my bag.

Once the handles are attached, the bag is complete. Enjoy!

Wednesday, March 22, 2006

Child's Patterned Hat

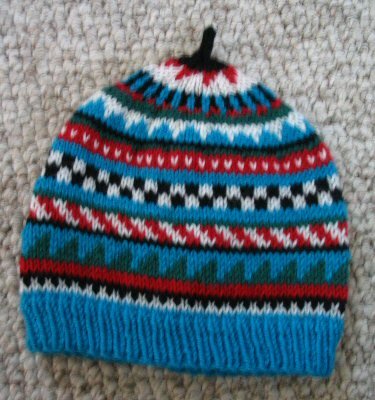
Childs Patterned HatAfter knitting so many infant hats for charity last week, I had to make a hat for my 3-year-old. He had informed me that I'd made all 'his' baby hats too small for him and that I needed to make them bigger. He needed a new hat. He lost his toque when we visited Lowe's last week, and it never showed up in the lost and found bin.

First, I measured his head: it's 19"/48cm around and the hat must be at least 7"/18cm tall in order to cover his ears well. I am getting a gauge of about 5 stitches to the inch with worsted weight wool(about 20 stitches to 4"/10cm), so that would be about 95 stitches. Make that 96 and you have a number divisible by 2, 3, 4, 6 and 8-that means more choices of motifs. I don't need a really dense fabric here in the warmer climate of California, so a size 7 circular needle is fine. Add in a size 6 for the ribbing and a set of double pointed needles for closing the crown. I used the same basic procedure that I used in the baby hats.

Click to enlarge chartCast on 96 stitches on a 16"/40cm size 6US/4mm circular needle.
Join without twisting the stitches to begin knitting in the round.
Work knit one purl one ribbing until piece measures 1.25"/3cm.

Change to a 16"/40cm size 7US/4.5mm needle and begin knitting stockinette stitch (knit every round) until the hat measures 6"/15cm long, including ribbing; at the same time, begin working color patterns from the chart or those of your own choice.

Begin decreasing using a guideline of 8 stitches evenly distributed every 2 rounds 11 times. (I decreased 16 stitches about every 4 rounds 5 times and 8 stitches every 2 rounds once to make it fit in between the pattern rounds of color motifs) You want to place your decreases so that they don't interfere in the color design. So, work decreases until you have 8 stitches left, changing to short double pointed size 7US/4.5mm needles when needed. K2tog across round. Make I-cord using remaining 4 stitches until the cord is about an inch long. Cut the yarn and thread it through the stitches with a tapestry needle to fasten it off. Weave in all the ends.

This hat fits my toddler with extra room on top for growth. It stretches and can be worn by older children and teens. It even stretches to fit me a little snugly. This would make a great charity knitting project. Enjoy!

P.S. more charts to use for this hat here and here.

Needle Exchange Arrives

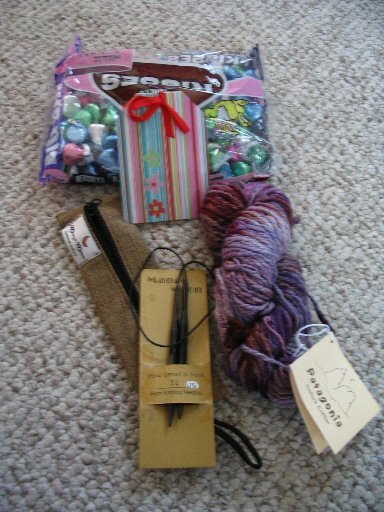
I have to show you what my Needle Exchange Pal sent to me. She sent me the greatest stuff!

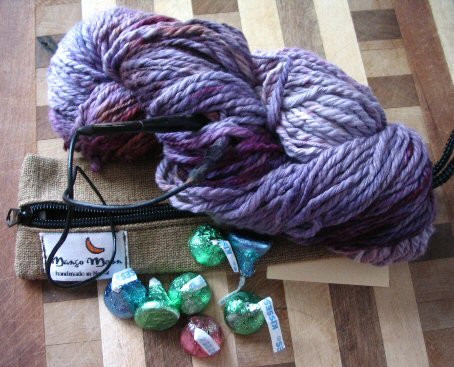
The first thing I saw when I opened the box was the huge bag of Hershey's Kisses. Mmmm, chocolate. Chocolate enough for weeks to come, chocolate to share if I feel like it. Chocolate is always a good thing. The next thing I found in the box was that cute little pouch. It was lumpy, there was something inside! I opened it to find... a beautiful circular needle of hand carved horn from Nepal! Wow! The final item in the box was a gorgeous hank of hand-dyed Patagonia Nature Cotton-in purple, my favorite color.

Isn't this the very picture of knitterly happiness? A hank of yarn, a set of needles and chocolate. What more could you want?

Thank you Amy for these delights!

Sunday, March 19, 2006

Infant Earflap Hat

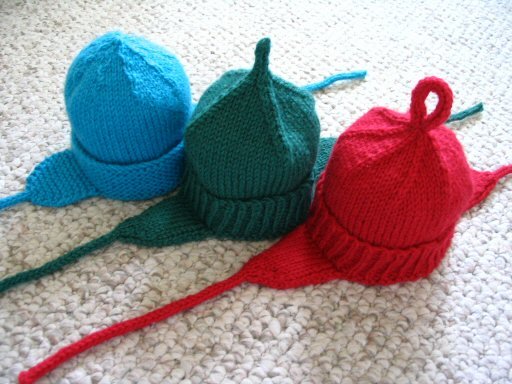
Baby hats with earflapsHere is my pattern for a newborn size hat with earflaps. By newborn size, I mean the hat is designed to fit a 13" to 15" head (33-38cm). You may make this hat without earflaps if you wish; I designed the pattern to meet the requirements of afghans for Afghans guidelines for their newborn hat and sock project. It has a fold-up cuff that can be unfolded as the baby grows. The pattern for the top-down version of the hat can be found here. To see a photo of Sarah's beautiful fairisle version visit here.

In the photo above left, you see from left to right a blue hat, a green hat and a red hat. Where there are variations in the pattern, I will use colored text to show the differences in the directions for each hat as shown. You may of course mix and match the design variations to suit yourself. The blue hat has a garter stitch cuff, a serpentine decrease design and a smooth top. The green hat has a ribbed cuff, a square decrease pattern and a short tail on the top. The red hat has a ribbed cuff, a spiral decrease pattern and a loop on top that may be used for hanging.

The hats take a little less than 50 grams of worsted weight yarn to make up. I used leftover wool yarn for my samples, Nature Spun worsted and Patons Classic Wool. The yarn ball bands recommend a size 7US/4.5mm needle, but I used a size 6US/4mm because I wanted the hats to be a little bit more densely knit for warmth. There isn't very much difference between the two needle sizes, so use the size that suits you. I recommend using a set of 4 or 5 double pointed needles (DPNs) and a 11.5"/29cm circular needle in your chosen size. At the very minimum you will need a set of DPNs to make the hat as directed.

Abbreviations and techniques:
Rnd=round
K2tog=knit 2 stitches together.
ssk=slip the next 2 stitches as if to knit, put left needle in front of stitches and knit.

How to make I-Cord:
Using 2 DPNs, CO 4 stitches (or use the remaining 3 or 4 stitches after decreasing in this pattern). Knit all stitches. Next Row: Instead of turning the work around to work back on the wrong side, slide all stitches to the other end of the needle, switch the needle back to your left hand, bring the yarn around the back of the work, and start knitting the stitches again. Repeat this row to form I-cord. After a few rows, the work will begin to form a tube.

Knitty Magazine has great articles on Increasing and Decreasing, Picking up Stitches and Weaving in Ends.

Begin by knitting the cuff.

Cuff 1: Ribbed cuff used on red and green hats.
Cast on 64 stitches using circular needle.
Join into a round without twisting stitches and begin working knit 1 purl 1 ribbing.
Work ribbing until it measures 1.5"/4cm

Cuff 2
: Garter stitch cuff used on blue hat.

Cast on 64 stitches using circular or DPN needle.
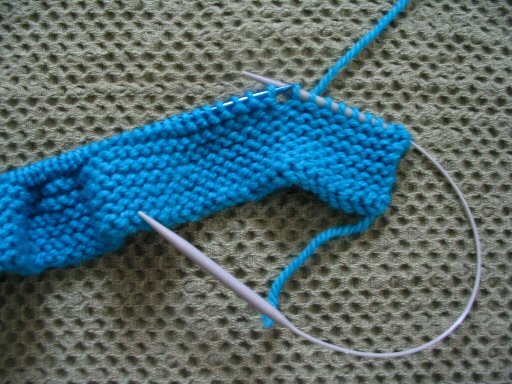
Work the piece flat, knitting every row until the cuff measures 1.5"/4cm
Join into a round without twisting the stitches and continue the hat working in the round.

Knitting flat on DPNs using point protectorsKnitting from DPN to circular needleJoining flat knitting into a round
Next, work the body of the hat.
Work stockinette stitch (knit every round) until the hat measures 5"/13cm long including the cuff.

Now work the decreases.
All 3 hats are decreased 8 stitches every other round 7 times, the difference is where the decreases are placed and whether they lean to the left or the right. Change from circular needles to DPNs when necessary.

Decrease pattern 1: Spiral, used on red hat.
Rnd 1: *Knit 6, k2tog* repeat from * to * across round; 56 stitches.
Rnd 2: Knit all stitches.
Rnd 3: *Knit 5, k2tog* repeat; 48 stitches.
Rnd 4: Knit.
Rnd 5: *Knit 4, k2tog* repeat; 40 stitches.
Rnd 6: Knit.
Rnd 7: *Knit 3, k2tog* repeat; 32 stitches.
Rnd 8: Knit.
Rnd 9: *Knit 2, k2tog* repeat; 24 stitches.
Rnd 10: Knit.
Rnd 11: *Knit 1, k2tog* repeat; 16 stitches.
Rnd 12: Knit.
Rnd 13: *k2tog* repeat; 8 stitches.

Decrease pattern 2: Square, used on green hat.
Rnd 1: Knit 6, *k2tog, ssk, knit 12* 3 times, k2tog, ssk, knit 6; 56 stitches.
Rnd 2: Knit.
Rnd 3: Knit 5, *k2tog, ssk, knit 10* 3 times, k2tog, ssk, knit 5; 48 stitches.
Rnd 4: Knit.
Rnd 5: Knit 4, *k2tog, ssk, knit 8* 3 times, k2tog, ssk, knit 4; 40 stitches.
Rnd 6: Knit.
Rnd 7: Knit 3, *k2tog, ssk, knit 6* 3 times, k2tog, ssk, knit 3; 32 stitches.
Rnd 8: Knit.
Rnd 9: Knit 2, *k2tog, ssk, knit 4* 3 times, k2tog, ssk, knit 2; 24 stitches.
Rnd 10: Knit.
Rnd 11: Knit 1, *k2tog, ssk, knit 2* 3 times, k2tog, ssk, knit 1; 16 stitches.
Rnd 12: Knit.
Rnd 13: *k2tog, ssk* across rnd; 8 stitches.

Decrease pattern 3: used on blue hat.
Rnd 1: Knit 3, *k2tog, knit 6* 7 times, k2tog, knit 3; 56 stitches.
Rnd 2: Knit.
Rnd 3: Knit 3, *ssk, knit 5* 7 times, ssk, knit 2; 48 stitches.
Rnd 4: Knit.
Rnd 5: Knit 2, *k2tog, knit 4* 7 times, k2tog, knit 2; 40 stitches.
Rnd 6: Knit.
Rnd 7: Knit 2, *ssk, knit 3* 7 times, ssk, knit 1; 32 stitches.
Rnd 8: Knit.
Rnd 9: Knit 1, *k2tog, knit 2* 7 times, k2tog, knit 1; 24 stitches.
Rnd 10: Knit.
Rnd 11: Knit 1, *ssk, knit 1* 7 times, ssk; 16 stitches.
Rnd 12: Knit.
Rnd 13: *K2tog* across rnd; 8 stitches.

Finishing the top.

Top treatment 1: Loop on red hat.
Rnd 14: *k2tog* across rnd; 4 stitches.
Make I-Cord on remaining 4 stitches until it measures 4"/10cm long.
Cut yarn about 4"/10cm long, draw yarn through all stitches to fasten off. Sew the end of the cord to the base of the hat to make a loop.

Top treatment 2: Short tail on green hat.
Rnd 14: *k2tog* across rnd; 4 stitches.
Make I-Cord on remaining stitches until it measures 1"/2.5cm long.
Cut yarn about 3"/8cm long, draw yarn through all stitches to fasten off.

Top treatment 3: Smooth top on blue hat.
Cut yarn at about 3"/8cm long. Draw yarn through the remaining 8 stitches, pull tightly and fasten off.

At Last, The Earflaps
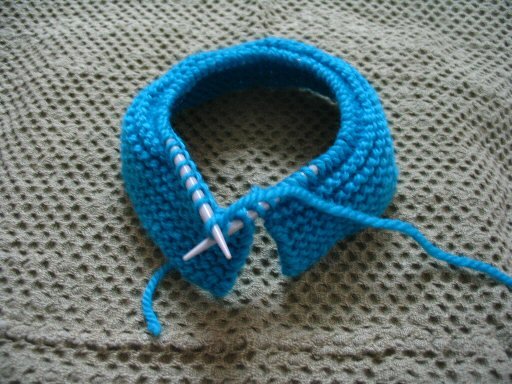
In this step you'll be picking up 12 stitches along the edge of the cuff and then knitting them to form the earflap and tie cord. These earflaps are spaced evenly apart on the two sides of the hat. You may wish to use the decrease lines to help position them neatly.

Place the hat in front of you upside-down with the cuff folded down so that you can just see the edge of the interior of the hat, as shown in the photos.

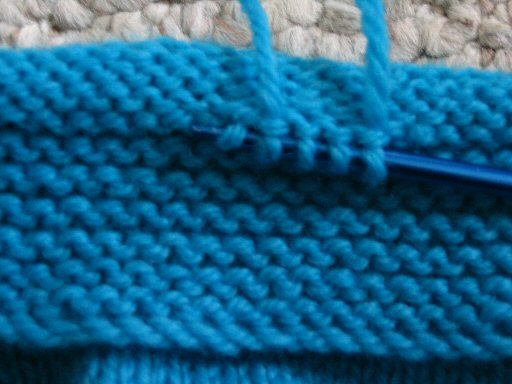
Edit: You will be picking up stitches along the folded edge of the cuff, where you changed from rib stitches to plain stockinette.

Picking up stitches next to ribbed cuffEarflap 1: Used on red and green hats.
Pick up 12 stitches along the edge of the cuff, as shown.
Row 1: Purl 1, knit 1, purl 8, knit 1, purl 1.
Row 2: Knit 1, purl 1, knit 8, purl 1, knit 1.
Repeat rows 1 and 2 until the flap is 11 rows long.
Row 12: Knit 1, purl 1, k2tog, knit 4, ssk, purl 1, knit 1; 10 stitches.
Row 13: Purl 1, knit 1, purl 6, knit 1, purl 1.
Row 14: Knit 1, purl 1, k2tog, knit 2, ssk, purl 1, knit 1. 8 stitches.
Row 15: Purl 1, knit 1, purl 4, knit 1, purl 1.
Row 16: Knit 1, purl 1, k2tog, ssk, purl 1, knit 1; 6 stitches.
Row 17: Purl 1, knit 1, purl 2, knit 1, purl 1.
Row 18: *K2tog* 3 times; 3 stitches.
Continue working the remaining 3 stitches as I-Cord until the cord measures 6"/15cm.
Cut yarn about 3"/8cm long. Draw yarn through all stitches and fasten off.

Repeat for second earflap. Weave in all ends.

Picking up stitches next to garter stitch cuffEarflap 2: Used on blue hat.
Pick up 12 stitches along the edge of the cuff, as shown.
Row 1: Knit.
Row 2: Knit.
Repeat rows 1 and 2 until the flap is 11 rows long.
Row 12: Knit 1, k2tog, knit 6, ssk, knit 1; 10 stitches.
Row 13: Knit.
Row 14: Knit 1, k2tog, knit 4, ssk, knit 1. 8 stitches.
Row 15: Knit.
Row 16: Knit 1, k2tog, knit 2, ssk, knit 1; 6 stitches.
Row 17: Knit.
Row 18: *K2tog* 3 times; 3 stitches.
Continue working the remaining 3 stitches as I-Cord until the cord measures 6"/15cm.
Cut yarn about 3"/8cm long. Draw yarn through all stitches and fasten off.

Repeat for second earflap. Weave in all ends.