Sunday, December 10, 2006

Holiday Activities

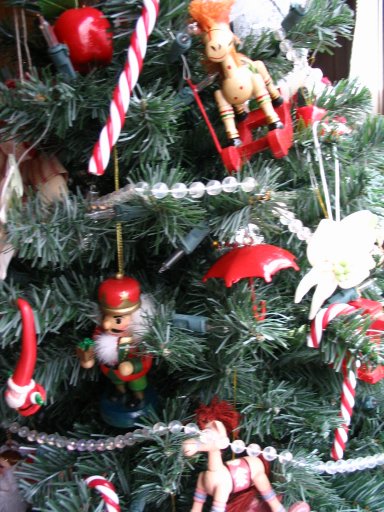
Close-up of my treeIt's always busy this time of year, so many things to do. Whether baking, decorating or shopping in preparation for get-togethers with friends and family, our to-do lists are full.

I am trying to simplify my life (and my list) to make more room for just enjoying time with family. I have a houseful of family members staying from out of town this year and it is tempting to over-schedule myself trying to make everything 'perfect'. I am resisting by scaling things down a bit. For instance, I chose a small tabletop tree instead of the traditional 6-footer because it takes much less time for the group to decorate and is more enjoyable for the folks with shorter attention spans.

Make-n-take from local scrapbook storeI am also taking fewer shopping trips and choosing more enjoyable places to visit. I refuse to participate in the frenzy that has become all too common at popular retail stores with mega sales that encourage people to push and shove and fight over this bargain or that. Instead, I take my family to responsible stores like my local scrapbooking shop. A creative bunch, they hosted a 'Make and Take' event that even the 3-year-old could enjoy. Hubby and teenagers all had fun with foam stamps and acrylic paint decorating little canvas bags that we plan to use as gift bags.
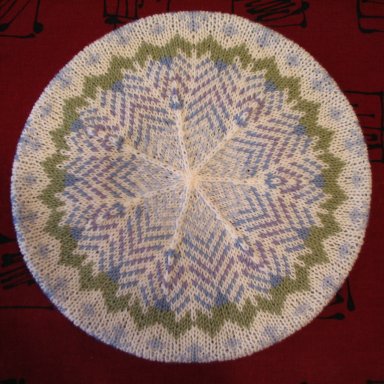
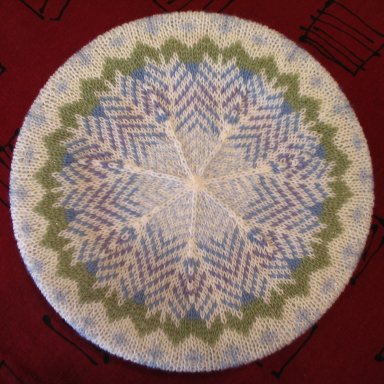
Snowflakes TamThis effort has paid off. I've had much more time to spend with my loved ones, and I've even had time to knit a bit in the evenings. Here is my new fair-isle wheel tam. I have decided to follow Mary Rowe's lead and give it a title- Snowflakes.

The pattern is my own, but it is inspired by the work of many people. I have studied books, magazine articles and examples on the internet. Some good books on the topic - Knitted Tams by Mary Rowe, Traditional Fair Isle Knitting by Sheila McGregor, 45 Fine and Fanciful Hats to Knit by Anna Zilboorg and 1000 Great Knitting Motifs by Luise Roberts.

Find the pattern here.

Snowflakes Tam Pattern

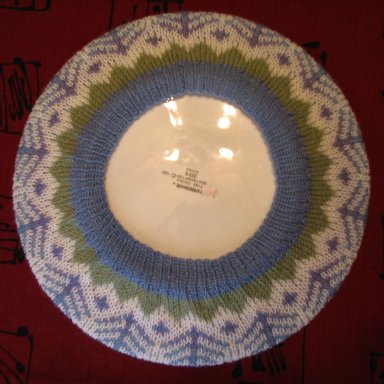
Top of Snowflakes Tam blocking on a dinner plateBottom of Snowflakes Tam blocking on a dinner plateThis is Snowflakes, my fair-isle wheel patterned tam. It will fit most small to medium sized adult heads. It is my own design and I'm sharing it with you here. If you want to learn more about making these lovely hats you can see my list of reference books in this post.

This is not a beginner's project, I would call it intermediate level. It involves 2-color knitting in the round using tiny size 1 US/2.25mm and size 3 US/3.25mm circular and double pointed needles. The challenge is to keep your tension even throughout.

Materials: Fine wool yarn that knits to a gauge of 28 stitches=4"/10cm. It must be wool or it will not block to shape. I used GGH Merino Soft, Lane Borgosesia Merino Extra Fine, and Le Fibre Nobili Tajmahal. You will need one 50 gm ball each of 5 colors or leftover yarns in the following amounts-

24 grams white
8 grams green
12 grams blue
4 grams pale blue
4 grams lavender

You will also need one stitch marker or small loop of contrasting yarn and 16"/40cm circular needles in size 1 US/2.5mm and size 3 US/3.25mm and a set of 4 double pointed needles in size 3 US/3.25mm or whatever size you need to knit your yarn to gauge.

Directions: Using size 1/2.5mm circular needle and blue yarn, cast on 134 stitches for ribbing. Join, being careful not to twist stitches, place stitch marker on needle to mark beginning of row, and work 1x1 ribbing (knit one, purl one) until tube measures 1"/2.5cm, or about 11 rounds.

Increase round: Switch to size 3 US/3.25mm circular needles. Knit 3, increase by knitting into the front and back of next stitch, *Knit 4, increase in next stitch* repeat between *'s around ending Knit 3, increase in next stitch. 168 stitches.

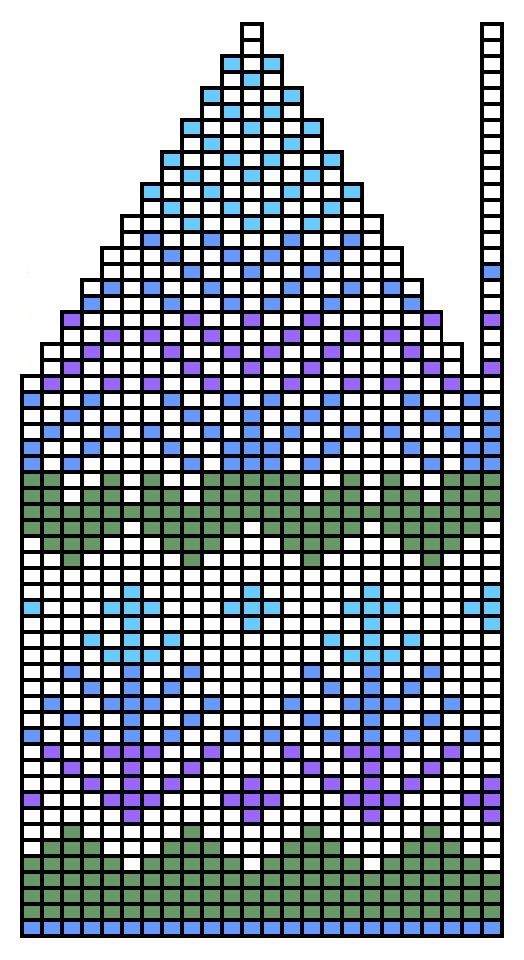
Knitting chart for Snowflakes TamBrim: Knit every round following the chart at left for color placement. Read the chart from bottom to top, from right to left, the way that you knit the piece. The chart is repeated 7 times around the hat. Continue moving the stitch marker to keep track of beginning of round.

Crown: Starting on row 36 of the chart, you will begin making double decreases every second round to shape the crown of the hat, represented by the single column of stitches. (The chart makes a stair-step to represent the stitches decreased out of the crown.) The center stitch of the decrease is prominent and decorative, and is performed in this manner-slip 2 stitches as if to knit 2 together, knit the next stitch, pass the 2 slipped stitches over the stitch you've just knitted. You will want to keep your stitch marker at the edge of the decrease line.

Continue working, decreasing 14 stitches every other round, changing to double pointed needles when this becomes necessary. Draw yarn through last 14 stitches and pull tightly. Weave in yarn ends.

Snowflakes Tam before blocking, modeled by a pumpkinSnowflakes Tam on the headFinishing: At this point, the tam will look like the photo at left. It will seem a little small to fit an adult, but it will be a little larger after blocking.

To block the hat, wet it well and roll it up in a towel to remove excess water without wringing or twisting the hat out of shape. Gently stretch the hat over a dinner plate and pat it into place. See the photos at the top of the page to see what it should look like. Allow it to dry completely, which will take a day or two.

The photo at right is what the finished hat looks like, modeled by one of my teens.

Thursday, November 23, 2006

Happy Thanksgiving

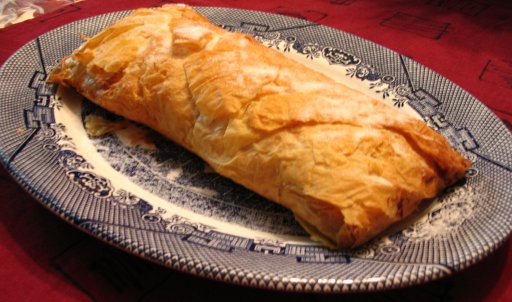
simple cheese pastryHappy Thanksgiving morning. I want to share with you all my recipe for a simple yet elegant pastry I like to make for my family for holidays or special occasions.

Please note, this is not a low-fat recipe, that's why I only make it for special occasions.


Cheese Filled Pastry

1/2 package frozen prepared Phyllo dough
1/4 cup butter, melted

Filling:
1 8-ounce package cream cheese or neufchatel
1/2 cup sugar
1/2 teaspoon vanilla extract (or flavoring of your choice)
pinch salt

Preheat oven to 350f/175c. Brush a baking sheet with melted butter and set aside.

In a small bowl mix together the filling ingredients until smooth.

Open the package of phyllo dough and cover the stack of sheets with a damp cloth to keep them from drying out and breaking while you work. Working on a clean and dry board or counter top, carefully lay a sheet of dough on the dry surface and brush it with melted butter. Lay another sheet on top of the first and brush with butter. Continue until you have 8 layers assembled.
Spoon the filling along one short edge of the rectangle of dough and start rolling it, tucking the edges under to seal the ends, brushing with butter to make the dough stick together.
Place 2 more sheets of dough on work surface and place the rolled pastry on top of it diagonally, brush with butter and wrap the dough around it envelope style to seal the pastry.

Place the rolled pastry on the buttered baking sheet. Brush the pastry with butter one last time, sprinkle with a little sugar and bake it until well browned, about 30 minutes.

Serves 4-6.

Saturday, October 28, 2006

Pumpkin Largesse

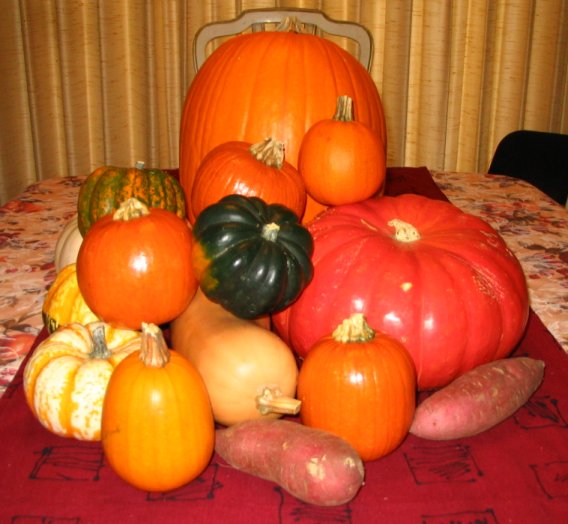
Our pumpkin haulI received a request to see a photo of our haul of pumpkins from our multiple visits to the pumpkin patch. So, here you go Carol, a glimpse of our pumpkin largesse.

Yes, strictly speaking there are more than just pumpkins in that pile. The pumpkin merchants were selling squash of many types and referring to them all as different kinds of pumpkins. For the entertainment value perhaps. More likely to make the children demand more produce for the holiday.

In addition to the usual orange varieties, we chose the nearly red 'Cinderella Pumpkin', the white 'ghost pumpkin', striped 'tiger pumpkin' and crooked 'bent pumpkin'. You may recognize acorn, sweet dumpling, butternut and carnival squash. Some yams were added to the pile for good measure.

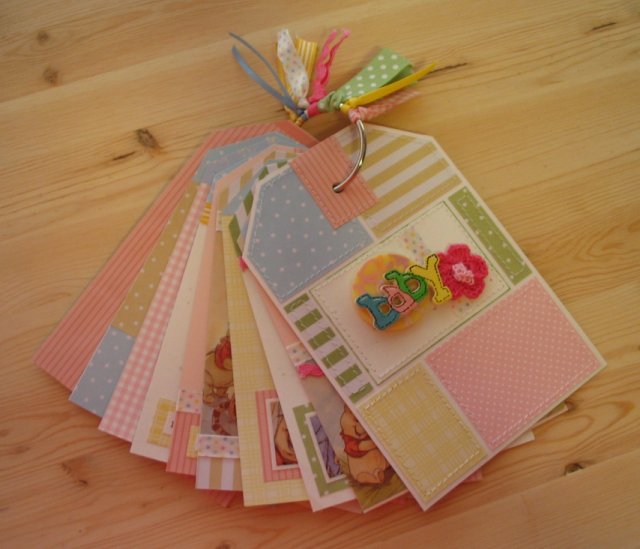
a baby brag bookHere is a baby brag book that I have been working on. It is made from cardstock tags measuring 4"x6" and decorated with patterned scrapbook papers, stickers and ribbons. The booklet is held together with a clip ring that has ribbons tied to it, so the recipient can make more tags to add to it if she wishes.

I made this mini scrapbook as a gift to accompany the yellow baby layette that I recently finished.

It was a lot of fun to make. I plan on making more of these.

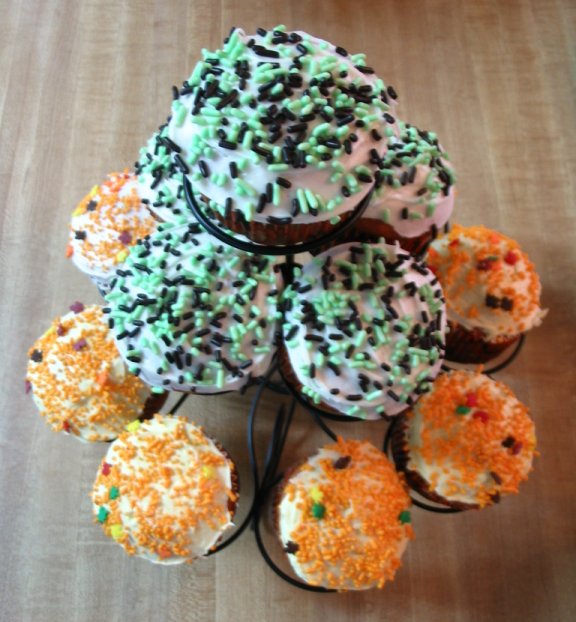
simple cupcakes with sprinklesI made simple cupcakes for our upcoming neighborhood Halloween party. You know, easy stuff; cake mix, frosting in a tub, packaged sprinkles.

Never try to make just one batch of any baked good and send it off somewhere else, your family members will stage a revolt or a mutiny or somesuch.

So, of course, I made a second batch for the family. I have made the cupcakes even more 'special' by using different types of sprinkles. The party cakes only use one kind of sprinkles, and are therefore inferior. It has nothing to do with running out of sprinkles for our home cakes, going to the store and finding out they had run out of the kind I had used previously and having to choose another type, oh no. It is so that the 3-year-old can taste his cupcakes with different flavored sprinkles. Oh yes, I'm sticking with that story, you bet.

Monday, October 16, 2006

Pumpkins and Dresses

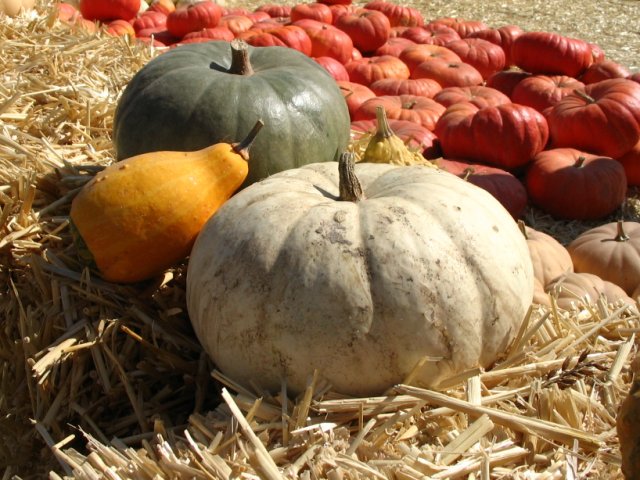
pumpkins and gourdsIt is time for our annual trip to the pumpkin patch.

Actually, I think we will be making a few trips this year. The pre-schooler is now old enough to enjoy the entertainments offered by the pumpkin purveyors and he wants to go back again and again. I have a feeling we will have more pumpkins in the house than we'll know what to do with.

I have continued to work on the red cardigan. I've completed the knitting and about one half of the sewing up. Lately I have been too distracted to finish it. Instead I have been working on my prayer shawl. It is simple and repetitive and does not require concentration, and it is something that I can pick up and put down easily while in waiting rooms.

simple sundressesI finally have a photo to show you of the simple sundresses I made this summer for my friend's wedding. They were cool and comfortable for her to wear in the Las Vegas heat.

I apologize for their wrinkled condition. The photo was obtained stealthily by her mother and myself. The dresses were hurriedly pulled out of a moving box, laid on the floor for this photo, repacked and out the door again and into the truck.

I hope that I will get a better photo to post at a later date.

Friday, September 08, 2006

BBQ and a Hooded Cardigan

We had a pleasant time over the Labor Day weekend. Like many folks, we had a barbeque with friends and family. We don't do fancy BBQ like you see on the Food Network; we stick to simple, familiar foods that everyone likes, and prepare plenty of it.

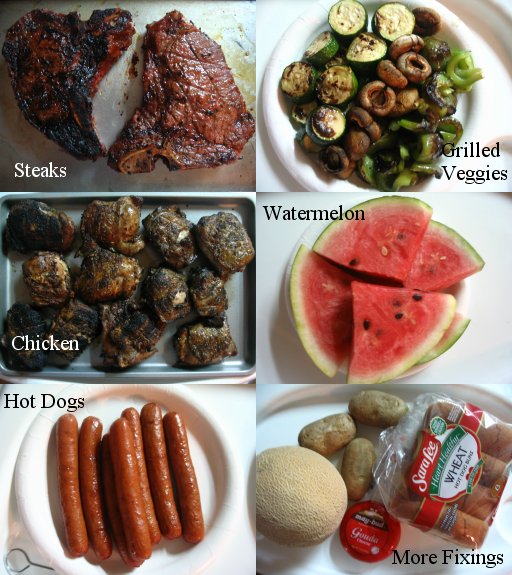
Here's a collage photo of some of the offerings at our place this year.

Marinated steaks and chicken, hot dogs and assorted vegetables were grilled. We have had great success with mushrooms, bell pepper and zucchini threaded onto skewers before cooking. Baked potatoes, coleslaw, fresh melons and assorted buns and rolls filled out the menu.

This feast didn't take a lot of time to prepare. We purchased steaks and chicken from the grocery store meat counter that were already marinated and ready to throw on the grill. While the guys hovered around the BBQ, I cut up melons and baked potatoes in the microwave. I even had time to start a new project.

It's the end of summer, so I decided to make a sweater for the 3-year-old for the cooler weather of fall and winter. The Stephanie jacket from Anny Blatt Creation magazine #1 is just perfect. It's an aran-style hooded cardigan that I fell in love with at first sight. In fact, it's that one pattern that convinced me to purchase the book.

A side note here: Anny Blatt and Bouton d'Or books have great designs, but their pattern instructions are not always as detailed as I would like them to be. I am an experienced knitter, so I have no difficulty figuring out the bits they've left out of the pattern, but I chafe at the necessity of having to figure it out when I've paid a princely sum for a pattern book which should include all the information one needs to recreate the garment.

If you are not an advanced knitter, you may have difficulty following some of the patterns in these books. I recommend that you make sure you have an experienced knitter that you can ask for assistance, whether a friend or your local shop owner, your first time using one of these patterns.

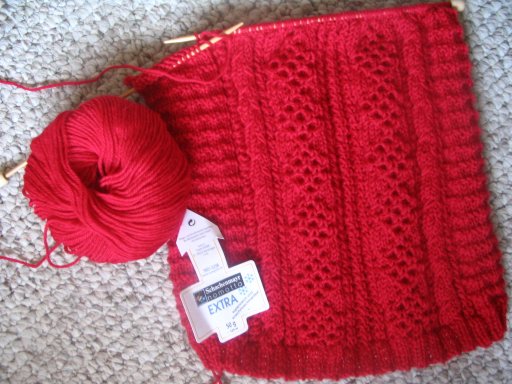
In the photo on the left is the beginning of the back of the sweater. In the photo on the right is my progress after a full week. The sweater back, left front and right front pieces are completed.

As you can see, my youngest has chosen a lovely watermelon red for his sweater. This is Schachenmayr Nomotta Extra 100% superwash wool. 22 stitches x 30 rows = 4 inches/10cm on #5US/3.75mm needles. I like the yarn so far, it has a nice texture and it doesn't split very easily while knitting.

Wednesday, August 30, 2006

Teal Layette

Pingouin Layette fall/winter '95/'96I was at my local yarn shop recently and was looking through the selection of baby pattern books. There are quite a lot of them to look at I must say. My favorites are the French ones, Pingouin, Anny Blatt and Bouton d'Or. Sometimes I find a nice English or German one.

This time I found a Pingouin that I didn't already have and squealed with delight. The ladies in the shop are used to this behavior and shared my pleasure with knowing smiles.

After finishing with the patterns I moved on to the sale bins. 40% off is not to be ignored. I found quite a bit of Sirdar Rio in nice soft colors. It's 60% cotton and 40% acrylic, making it a good choice for summer or multi-seasonal garments. So I stocked up.

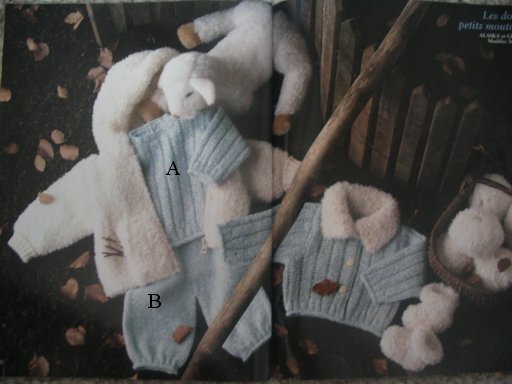
Pingouin Layette fall/winter '95/'96 patternThis is the specific pattern that interested me in this Pingouin book. The long sleeve pullover A and the pants B in the photo at left. It's a simple classic outfit suitable for either gender. I like the stitch pattern on the pullover and the color is divine. I found some Rio in just that shade, so wanted to try it out.

There is one problem with the pattern-I don't like the 2x2 ribbing they used with the 2x4 garter rib stitch of the body of the sweater. To me, it doesn't look like it's in keeping with the design. I also don't like the little rolled edges, they just have a tendency to collect baby drool. So I changed it to single rib.

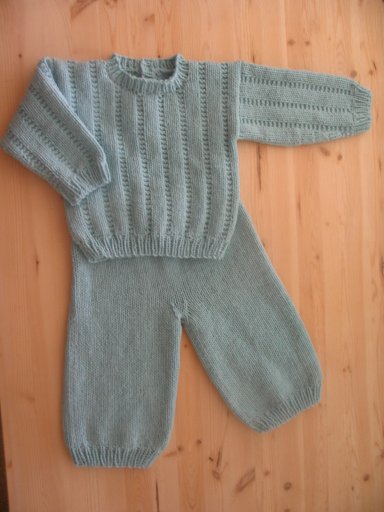
Finished Teal LayetteSo here is the finished product. I do like the single rib much better with the pattern stitch. Sirdar Rio has nice stitch definition and it doesn't split easily while knitting.

Because the yarn is cotton rich, it also doesn't have a lot of elasticity. This made the waistband a little too loose. I have installed a drawstring for the time being, but may use some elastic thread to pull it up properly around the waist in future.

This is one of the things that may happen when substituting yarns in patterns. Cotton doesn't behave the same way as wool, which doesn't behave exactly the same way as synthetics. To make things more confusing, different yarns of the same fiber will behave differently too. I find baby clothes are a good way to experiment with yarns to discover just what kind of fabric they will make before I decide to make an adult sized garment.

Edit: This newborn-sized outfit used 4 balls of Sirdar Rio.