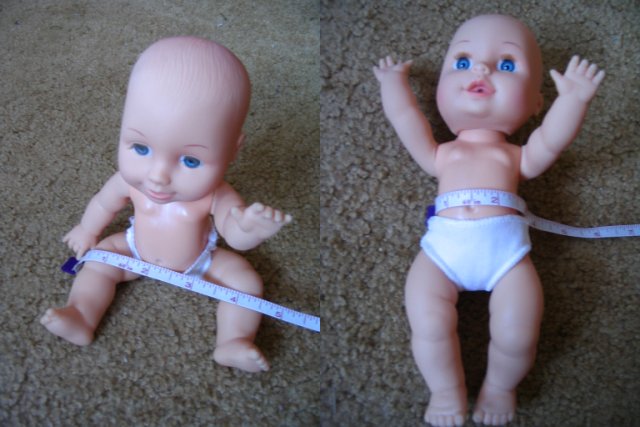
 This is the toddler's new baby doll, one of those inexpensive ones you find in discount stores. It didn't come with much clothing, so I was asked to make something to 'keep baby warm'.
So, I sat down to knit a simple bunting.
As you can see, when the doll is in a sitting position, the legs spread quite wide. This is a problem. If the bunting is made in the same way a real baby garment is, it would be too narrow to fit around the legs while seated. If the garment is made wide enough for the legs, then it is much too bulky in the torso. Some shaping is required to make it fit properly.
 I decided that I would make a prototype to test shaping and ease. If it turned out well then everyone would be happy. If it didn't go so well, then that would be ok too, it's just a test: a learning experience.
I chose garter stitch because it's easy and quick to work and the proportion of rows to stitches helps simplify the math. I decided to use raglan sleeves because they are easy to knit and to fit.
This doll's measurements:
Approximately 9 inches tall (23 cm.)
5-1/4 inches around belly (14 cm.)
10 inches around widest part of legs in seated position (25 cm.)
2-1/2 inches to fit loosely around thickest part of arm/hand (6.5cm)
Here's what I did:
Sleeves
Cast on 14 stitches, knit 18 rows or 9 ribs of garter stitch, cut yarn about 6 inches long and use a yarn needle to pull the yarn end through the stitches on the knitting needle- this works as a stitch holder. Make second sleeve to match. Set aside.
Body
Cast on 10 inches worth of stitches. I used King Cole brand Smarty Double Knitting yarn, which has a gauge of 22 stitches to 4 inches/10 cm. on US 5 needles (4mm). So, I cast on 56 stitches because I wanted an even number of stitches to divide front and back.
I knit straight garter stitch for a length that I thought would cover the legs from foot to knee, 24 rows or 12 ribs*. I then started decreasing at the sides to bring the width down to a good size to fit around the belly with some ease, 6 inches/15cm. I did it this way:
Row 25: Knit 12 stitches, K2tog, K2tog, knit 24 stitches, K2tog, K2tog, knit remaining 12 stitches- 52 stitches.
Row 26: Knit all stitches.
Row 27: Knit 11 stitches, K2tog, K2tog, knit 22 stitches, K2tog, K2tog, knit remaining 11 stitches- 48 stitches.
Row 28: Knit all stitches.
Row 29: Knit 10 stitches, K2tog, K2tog, knit 20 stitches, K2tog, K2tog, knit remaining 10 stitches- 44 stitches.
Row 30: Knit all stitches.
Row 31: Knit 9 stitches, K2tog, K2tog, knit 18 stitches, K2tog, K2tog, knit remaining 9 stitches- 40 stitches.
Row 32: Knit all stitches.
Row 33: Knit 8 stitches, K2tog, K2tog, knit 16 stitches, K2tog, K2tog, knit remaining 8 stitches- 36 stitches.
Row 34: Knit all stitches.
Row 35: Knit 7 stitches, K2tog, K2tog, knit 14 stitches, K2tog, K2tog, knit remaining 7 stitches- 32 stitches.
Row 36: Knit all stitches.
I then knit straight garter stitch for 10 more rows or 5 ribs to cover the area between the hip and armpit area where the sleeve opening begins.
Adding in the sleeves
Row 47: Knit the first 8 stitches, then take one sleeve and carefully put the sleeve stitches onto the left needle and pull out the stitch holder yarn, leaving the 6-inch tail hanging on the right edge of the sleeve. Smooth it out of the way of the work. Now, this is going to be awkward, trying to fit the sleeve stitches in between existing body stitches- just take it slowly and don't worry if things get a little loose, it can be fixed when you sew the underarm seam. Knit the 14 stitches of the sleeve and then knit the 16 stitches of the back. Again, carefully put the stitches from the second sleeve onto the left needle and remove stitch holder yarn. Knit stitches from second sleeve, then knit remaining 8 stitches. 60 stitches on the needle, sitting rather awkwardly, being pushed and pulled in different directions. This tightness will ease up with each row you knit after this.
Row 48: Knit all the stitches.
Raglan Decreasing
Row 49: Knit 6 stitches, K2tog, K2tog, knit 10 sleeve stitches, K2tog, K2tog, knit 12 stitches, K2tog, K2tog, knit 10 sleeve stitches, K2tog, K2tog, knit remaining 6 stitches- 52 stitches.
Row 50: Knit all stitches.
Row 51: Knit 5 stitches, K2tog, K2tog, knit 8 sleeve stitches, K2tog, K2tog, knit 10 stitches, K2tog, K2tog, knit 8 sleeve stitches, K2tog, K2tog, knit remaining 5 stitches- 44 stitches.
Row 52: Knit all stitches.
Row 53: Knit 4 stitches, K2tog, K2tog, knit 6 sleeve stitches, K2tog, K2tog, knit 8 stitches, K2tog, K2tog, knit 6 sleeve stitches, K2tog, K2tog, knit remaining 4 stitches- 36 stitches.
Row 54: Knit all stitches.
Row 55: Knit 3 stitches, K2tog, K2tog, knit 4 sleeve stitches, K2tog, K2tog, knit 6 stitches, K2tog, K2tog, knit 4 sleeve stitches, K2tog, K2tog, knit remaining 3 stitches- 28 stitches.
Row 56: Knit all stitches.
Row 57: Knit 2 stitches, K2tog, K2tog, knit 2 sleeve stitches, K2tog, K2tog, knit 4 stitches, K2tog, K2tog, knit 2 sleeve stitches, K2tog, K2tog, knit remaining 2 stitches- 20 stitches.
Row 58: Knit all stitches.
Knit 8 rows or 4 ribs of garter stitch for collar. Bind off.
Front Bands
Pick up 33 stitches along right front, knit 2 rows garter stitch, bind off. Repeat on left front.
*At this point I tried on the garment and discovered that I hadn't made it quite long enough, so I picked up stitches along the bottom edge and knitted another 10 rows or 5 ribs to make it long enough. I decreased on the 5th, 7th and 9th rows to make a curved bottom. It would be better to knit 34 rows to begin the work and pick up 38 stitches for the front bands.
Sewing up
Remember those 6 inch tails from the sleeves? that's what I used to sew the sleeve seams. It may need a little finessing and reinforcing to avoid having a hole in the armpit, so do that first before using matress stitch to sew the sleeve seam.
Lay the bunting on a flat surface with the front facing you and smooth it, overlapping the front bands in the center. Pin in place if needed and sew the bottom together using either a simple whip stitch or kitchener stitch. Stitch center fronts together about 2 inches up from the bottom. Sew 3 or 4 snaps to front bands to hold it together.
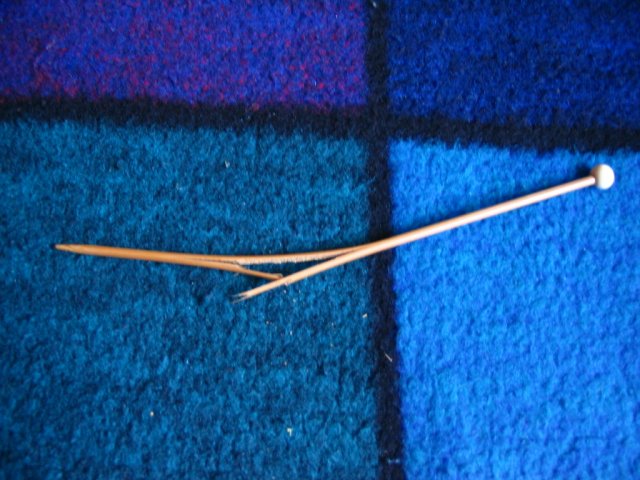 After I had finished the bunting, the toddler got hold of my needles again. There just seems to be something fascinating to that child about knitting needles. They are drumsticks usually, but this time the fascination was with splintering and breaking.