 It's always busy this time of year, so many things to do. Whether baking, decorating or shopping in preparation for get-togethers with friends and family, our to-do lists are full.
I am trying to simplify my life (and my list) to make more room for just enjoying time with family. I have a houseful of family members staying from out of town this year and it is tempting to over-schedule myself trying to make everything 'perfect'. I am resisting by scaling things down a bit. For instance, I chose a small tabletop tree instead of the traditional 6-footer because it takes much less time for the group to decorate and is more enjoyable for the folks with shorter attention spans.
 I am also taking fewer shopping trips and choosing more enjoyable places to visit. I refuse to participate in the frenzy that has become all too common at popular retail stores with mega sales that encourage people to push and shove and fight over this bargain or that. Instead, I take my family to responsible stores like my local scrapbooking shop. A creative bunch, they hosted a 'Make and Take' event that even the 3-year-old could enjoy. Hubby and teenagers all had fun with foam stamps and acrylic paint decorating little canvas bags that we plan to use as gift bags.
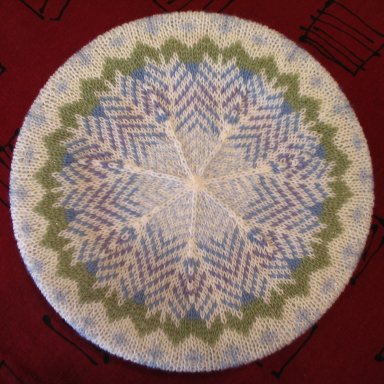
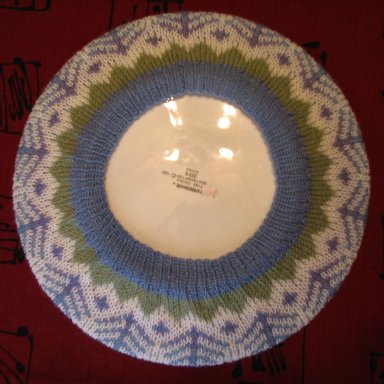
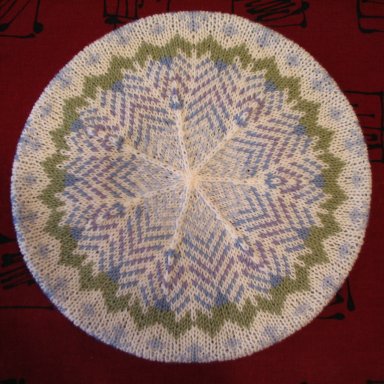 This effort has paid off. I've had much more time to spend with my loved ones, and I've even had time to knit a bit in the evenings. Here is my new fair-isle wheel tam. I have decided to follow Mary Rowe's lead and give it a title- Snowflakes.
The pattern is my own, but it is inspired by the work of many people. I have studied books, magazine articles and examples on the internet. Some good books on the topic - Knitted Tams by Mary Rowe, Traditional Fair Isle Knitting by Sheila McGregor, 45 Fine and Fanciful Hats to Knit by Anna Zilboorg and 1000 Great Knitting Motifs by Luise Roberts.
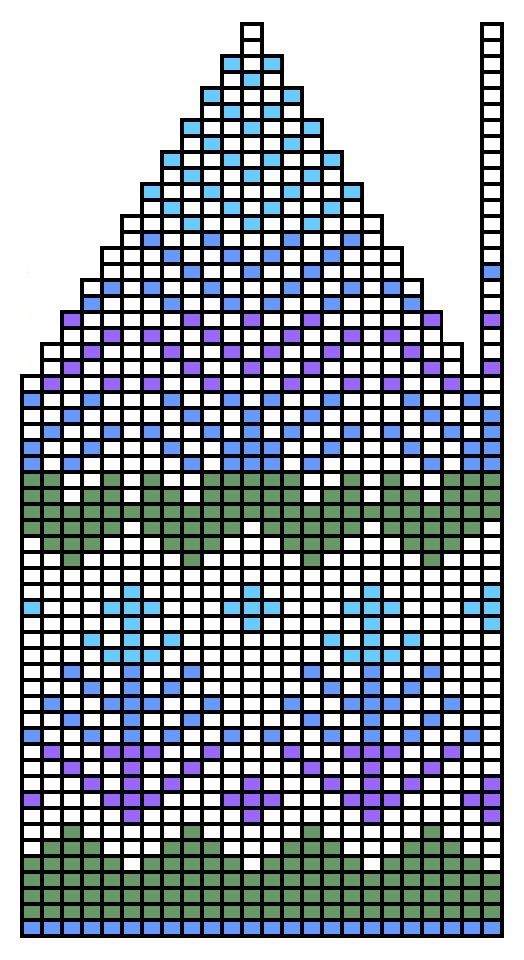
Find the pattern here.